Using Background Colors
This tutorial will show you how to customize a standard DitDat theme by setting your own background colors.
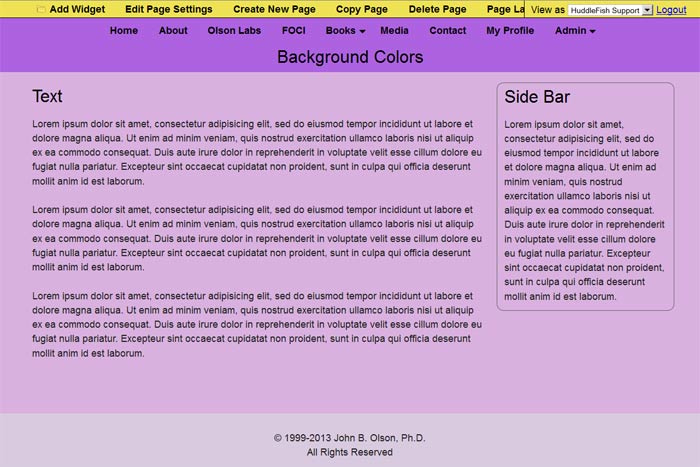
It will teach you how to go from this: To This:


It will teach you how to go from this: To This:
Open the Edit Page Settings Dialog:
Click on the "Edit Page Settings" button on the yellow DitDat builder bar to bring up the "Edit Page Settings" dialog. NOTE: You must be logged into your site and have edit permissions for the current page in order for you to be able to see the Builder Toolbar.
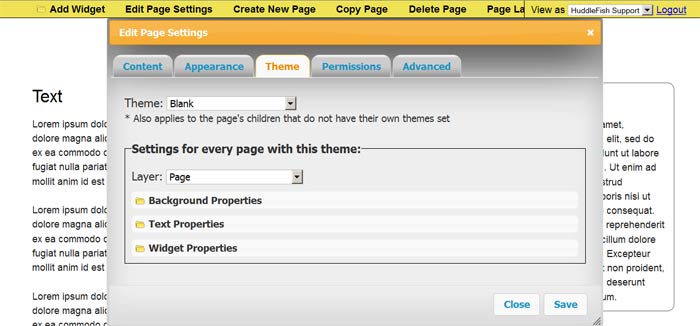
Select the Theme Tab:
If you want to apply background colors to every page on your site that uses a given theme, then click on the theme tab at the top of the dialog. NOTE: If you only want to change the background colors of the current page, then you should go to the appearance tab instead. If you set a property on the Appearance Tab, it will always override any properties you set on the Theme Tab. Likewise, properties set on the Theme Tab have priority over the default properties of the selected theme.
Select the Theme You Want to Modify:
Using the theme selector at the top of the dialog, select the theme you want to modify and click the Save Button at the bottom of the dialog. This will set the current page to the selected theme. If the theme you're interested in modifying is already selected, you don't need to click the Save Button before proceeding to STEP 2.
Click on the "Edit Page Settings" button on the yellow DitDat builder bar to bring up the "Edit Page Settings" dialog. NOTE: You must be logged into your site and have edit permissions for the current page in order for you to be able to see the Builder Toolbar.
Select the Theme Tab:
If you want to apply background colors to every page on your site that uses a given theme, then click on the theme tab at the top of the dialog. NOTE: If you only want to change the background colors of the current page, then you should go to the appearance tab instead. If you set a property on the Appearance Tab, it will always override any properties you set on the Theme Tab. Likewise, properties set on the Theme Tab have priority over the default properties of the selected theme.
Select the Theme You Want to Modify:
Using the theme selector at the top of the dialog, select the theme you want to modify and click the Save Button at the bottom of the dialog. This will set the current page to the selected theme. If the theme you're interested in modifying is already selected, you don't need to click the Save Button before proceeding to STEP 2.
Open the Background Properties Folder:
Open the Edit Page Settings Dialog to the Theme Tab if you're not already there, and click on the Background Properties folder tab located right below the layer selector. This should open up an area that allows you to set such properties as background color, opacity, shadow and glow effects, border styles and background images for the layer.
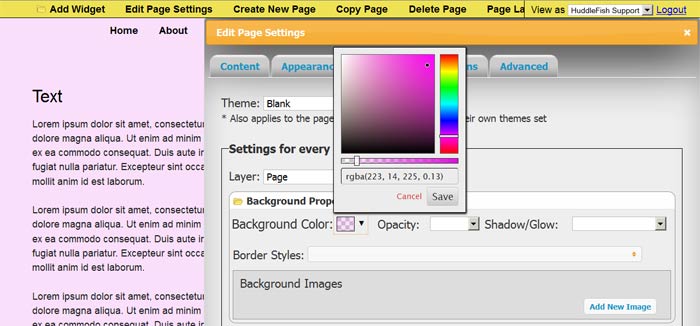
Open the Background Color Selector:
Click on the Background Color selector to bring up the color selector dialog. The current color will be displayed in the text box right above the Cancel and Save buttons. If the text box is blank, then no color has been selected so whatever color set by the theme will be used by default. If a color is selected, it will appear in the text box using a special rgb or rgba format (e.g. "rgba(223, 14, 225, 0.13)") that you don't need to understand.
Set a New Background Color:
Here's a tutorial on how to select colors using a color selector: How to Select Colors
As you change the color in the dialog, you should be able to see the page background changing colors. If the background color doesn't change, then check to make sure the opacity slider isn't all the way to the left (fully transparent).
Once you're satisfied with the color, click on the 'Save' button at the bottom of the color selector dialog. Then click 'Save' at the bottom of the larger Edit Page Settings dialog.
Your page should look something like this:
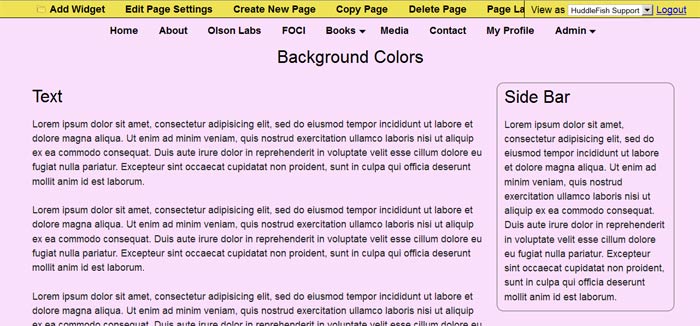
If the page loses the color you just set, then that's an indicator that the background color is being overridden by the corresponding setting in the Edit Dialog Setting Appearance Tab.
Now we're going to create a colored banner across the top of the page. This is almost exactly the same as the last step except that we're going to set the background color of the first OUTER_SECTION layer instead of the page layer.
Open the Edit Page Settings Theme Tab: (If it's not already open.)
Select "Outer Section 1":
Click on the Layer selector and choose "Outer Section 1". If you click on the "Page Layout" button on the yellow builder bar at the top of the page, you'll see that a page is composed of one or more sections which run vertically down the page. Section 1 is at the top of the page and is usually followed by Section 2 which is often followed by Section 3 (depending on how many sections your page contains -- you can have as many as you want).
Outer Sections extend all the way to the left and right edges of the page and each contain one Section (or inner section). In this example page Section 1 is only 960 pixels (960px) wide. We could set the color of Section 1, but we want our banner area to go all the way to the edges of the page so we're selection Outer Section 1 instead.
Open the Background Properties Folder
Set Background Color Property
Click Save
People's computer screens come in all different resolutions and sizes. One of the tricks to designing good web themes is coming up with a design that looks good on small, low-resolution monitors as well as huge, high-resolution monitors.
If your screen is "taller" than the content of your page, then you'll notice a white band of real estate right below the footer. This happens because the BODY layer of the page goes all the way to the bottom of the screen, but the PAGE layer (which we colored pink) takes the size of the content.
Here's what the bottom of our page looks like:
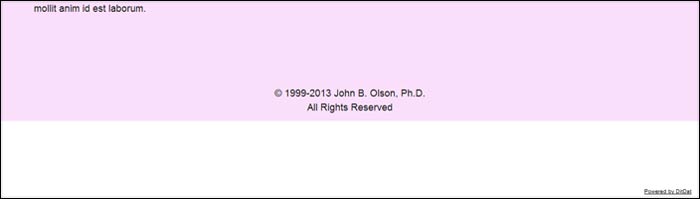
I could have avoided that problem by coloring the background of the BODY layer pink instead of coloring the PAGE layer, but I wanted to have a darker footer section, so here's what we're going to do instead:
1) Color the last OUTER SECTION purple.
2) Color the BODY layer the exact same shade of purple so that it looks like the footer section extends to the bottom of the page.
Select the LAST OUTER SECTION layer of the Theme Tab:
Bring up the Edit Page Settings dialog (if not already open), select the Theme Tab and then select LAST OUTER SECTION from the dropdown.
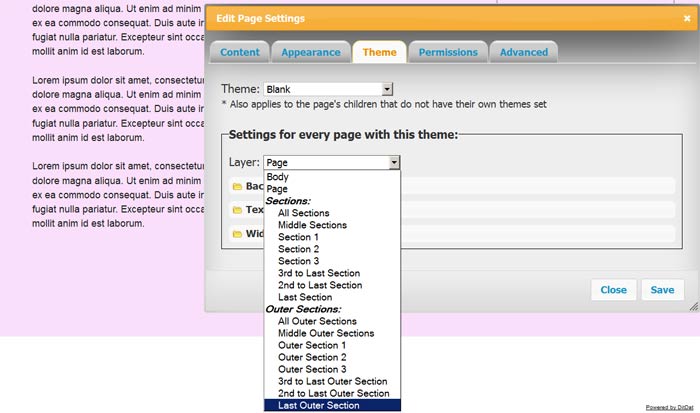
Notice that there are three sections and three outer sections on the page, but the dropdown menu lists each section twice -- once counting from the first one and once counting from the last.
Why does DitDat list each section twice?
Remember that different pages can have different numbers of sections. When you're designing a theme, you never know how many sections the page owner is going to add to the page in the future. If we colored OUTER SECTION 3 purple and then added three more sections to the page, the theme could obediently color the third section purple and we would get a colored band in the middle of the page -- not at the end where we wanted it. When we specify LAST OUTER SECTION, however, the system knows to always color the last section purple -- no matter how many sections a page has.
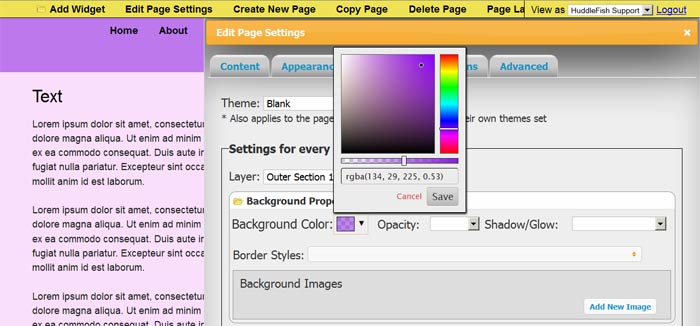
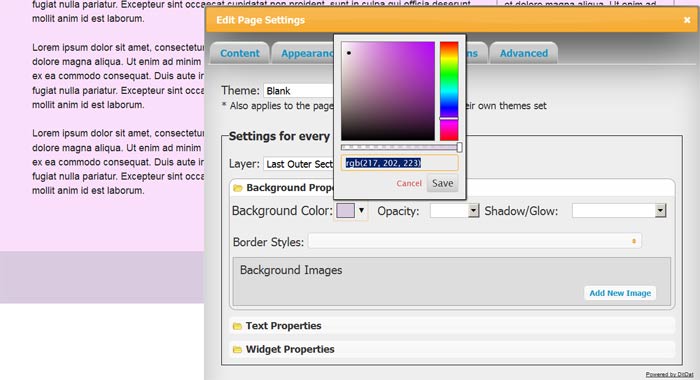
Set the Background Color for the Last Section:
Open the Background Properties folder and click on the background color selector to set a background color. Because we want to match this color with the background color of the BODY layer, we're going to set the opacity slider all the way to the right to keep the pink from the PAGE layer from bleeding through. NOTE: Before clicking 'Save' in the color selector dialog, use your mouse to select the color code from the text box so that we can use the same exact color when we set the background color of the BODY layer in the next step.
If your screen is "taller" than the content of your page, then you'll notice a white band of real estate right below the footer. This happens because the BODY layer of the page goes all the way to the bottom of the screen, but the PAGE layer (which we colored pink) takes the size of the content.
Here's what the bottom of our page looks like:
I could have avoided that problem by coloring the background of the BODY layer pink instead of coloring the PAGE layer, but I wanted to have a darker footer section, so here's what we're going to do instead:
1) Color the last OUTER SECTION purple.
2) Color the BODY layer the exact same shade of purple so that it looks like the footer section extends to the bottom of the page.
Select the LAST OUTER SECTION layer of the Theme Tab:
Bring up the Edit Page Settings dialog (if not already open), select the Theme Tab and then select LAST OUTER SECTION from the dropdown.
Notice that there are three sections and three outer sections on the page, but the dropdown menu lists each section twice -- once counting from the first one and once counting from the last.
Why does DitDat list each section twice?
Remember that different pages can have different numbers of sections. When you're designing a theme, you never know how many sections the page owner is going to add to the page in the future. If we colored OUTER SECTION 3 purple and then added three more sections to the page, the theme could obediently color the third section purple and we would get a colored band in the middle of the page -- not at the end where we wanted it. When we specify LAST OUTER SECTION, however, the system knows to always color the last section purple -- no matter how many sections a page has.
Set the Background Color for the Last Section:
Open the Background Properties folder and click on the background color selector to set a background color. Because we want to match this color with the background color of the BODY layer, we're going to set the opacity slider all the way to the right to keep the pink from the PAGE layer from bleeding through. NOTE: Before clicking 'Save' in the color selector dialog, use your mouse to select the color code from the text box so that we can use the same exact color when we set the background color of the BODY layer in the next step.
Select "Body" from the Layer Selector:
Open the Edit Page Settings dialog to the Theme Tab if you're not already there. Then select "Body" from the Layer dropdown.
Open the Background Properties Folder
Click Background Color Selector
Paste the Footer Color into Color Selector Text Box
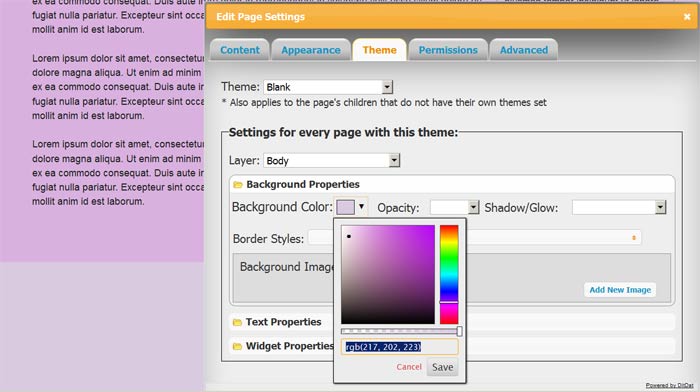
NOTE: If the color of the body layer doesn't match the color of the footer section, check to make sure that the opacity of the color selector of both layers is all the way to the right.
Open the Edit Page Settings dialog to the Theme Tab if you're not already there. Then select "Body" from the Layer dropdown.
Open the Background Properties Folder
Click Background Color Selector
Paste the Footer Color into Color Selector Text Box
NOTE: If the color of the body layer doesn't match the color of the footer section, check to make sure that the opacity of the color selector of both layers is all the way to the right.
Here's what the final result looks like:

To keep our prices dirt cheap, DitDat is a self-service tool.
If you need help, look here:
- The FAQ Page (Frequently Asked Questions).
- Email the other people in your cohort.
- The Newbie Forum.
- Ask a question at the next DitDat online seminar.
- DitDat Customer Support. (This will cost something! This is how we keep your basic prices low.)